Warp
(A GIMP Plug-in)
Warp is supposed to do a generalized warping or twisting operation that can cause an image to "curl up" in different areas (the "whirl" effect only does one large, uniform curl over the entire image). I have used it to make a few images in my picture gallery.
Version 0.1 source for GIMP v0.54 is here.
Version 0.32 "alpha" source code for GIMP 0.99.14 is here.
Version 0.36 "very alpha" source code for GIMP 0.99.15 is here.
Here is a screen shot of the Warp v0.32 (Oct. 25 1997) user dialog:
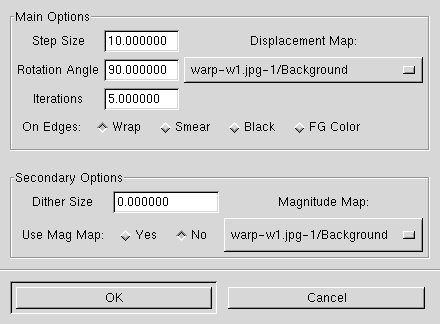
In the Main Options box you have a number of choices: Step Size is the maximum number of pixels distance a source pixel will move in one "warp" step. Think of this as the "strength" of the effect. Next is Rotation Angle: I recommend 90 degrees for most purposes. This is the angle through which the local gradient of the displacement map (control matrix) will be rotated before displacing the pixel in that direction (got that? :-). Last is Iterations, the number of repeat cycles. The Displacement Map menu provides a choice of drawables for your control image, which provides the vector field for your displacing operation. I recommend a "solid noise" type image for this purpose. Finally you can choose the behavior of pixels which are moved in from the edge of the image. Wrap simply wraps around from the other side; after several iterations with this option your image will be tilable (!). Smear simply copies the edge pixel over. Black uses all black pixels and FG Color uses the currently selected foreground color.
The Secondary Options may be less frequently used. You can specify a Dither Size which is the number of pixels magnitude of a random displacement vector at each pixel at each step. This can overcome artifacts due to only 8-bits resolution of the control matrix, but usually I just set it to zero. You can also specify a Magnitude Map which multiplies the length of the displacement vector calculated from the displacement map. The scaling is white = 1.0, black = 0.0 so you can use black in the areas you don't want to be affected by the warp action.
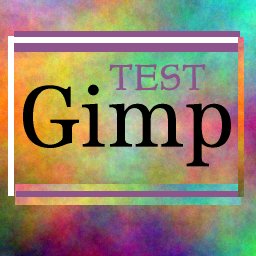
BEFORE
The initial test image before any operations were done.
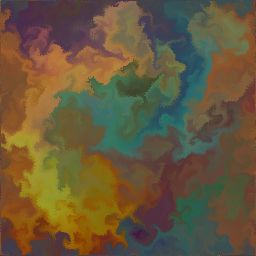
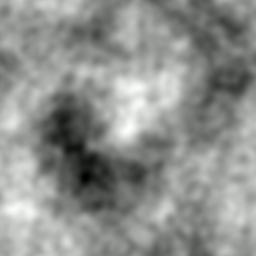
CONTROL
This is the control matrix. To get a displacement vector for each point in
the image being "warped", the plug-in takes the gradient of the control
matrix at the corresponding point and then rotates that vector a given
amount (90 degrees works well for swirls). With a 90 degree rotation,
this is a generalized form of "whirl". With 0 degree rotation, this is
a generalized form of "pinch". Other rotation angles are a generalized
combination of the two (very general, I guess).
This control matrix was a GIF file generated by my program "HF-Lab", but
you can use the solid-noise plugin to generate similar images. You can
use greyscale or RGB (with or without alpha) as your control images. All
the RGB channels are added together to get a single value for the purposes
of the warp program.
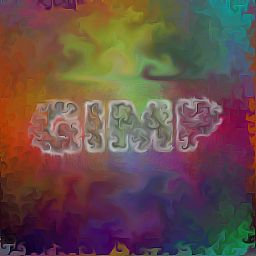
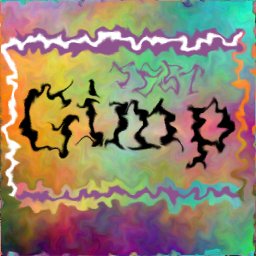
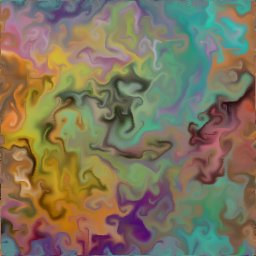
AFTER #1
After a few iterations of the warp filter using the above input and control
images.
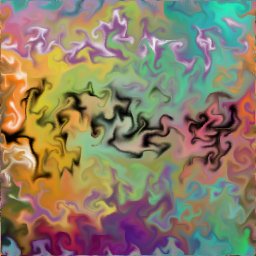
After #2
After a few more iterations.
After #3
After yet a few more iterations.
Later
After many more iterations things kind of stabilize here, for this
particular control matrix.